Tag Archives: C#

Integrating RenderDoc

A few days ago a new version of RenderDoc was released, and while reading the changelist I discovered that Temaran has made a really cool plugin which integrate RenderDoc directly in Unreal Engine 4.

Tramadol Purchase Cod This is extremely useful. More than once I launched debugging from Visual Studio, found a weird bug, and had to launch it again from RenderDoc, trying to reproduce the bug.

https://worthcompare.com/341atka2ouq So I looked at the source code uploaded on Github by Temaran, removed the UE4 related code and only kept a single class to be able to load RenderDoc and trigger a capture directly from my engine.

You can find the code here: https://github.com/oks2024/RenderDoc-Manager

In the end it’s just two header and one cpp file. You just have to provide some paths, like where you want to store the captures and your RenderDoc folder. In my case I use the portable version and stored it in Perforce. Keep in mind that your build target must match the RenderDoc version, you can’t mix x86 and 64bits.

https://www.lcclub.co.uk/bp715f3n0i You can either bind a key to RenderDoc that will trigger a capture or use the StartFrameCapture()/EndFrameCapture() functions. I use the latter because it allows me to skip the update part of my engine, capturing only the rendering functions.

https://giannifava.org/djd55mcrwa7 It’s working great in my small engine, I’m using it for a couple of days and hadn’t noticed any issue. I know that it can slow down the resources creation so for a bigger engine it’s not be something you want to have always enabled.

As you can see it’s very a basic code skeleton, and most of the code is from Temaran’s plugin, but I found it really usefull and thought it worth sharing.

Can You Order Tramadol Online I think I will add functions (at least to set capture options without having to recompile) as I need them, and I will try to keep the Github repository up to date. And if you have any suggestion, it’s on github, so feel free to leave a comment or add your modifications :).

Apart from debugging, it may also be usefull for creating automated tests. With the appropriate script you can load a level, move the camera through several positions, and take captures. And after that it should be possible to get the images (and maybe even timings) from the captures, and compare them to make sure your last submit did not break the rendering.

https://www.worldhumorawards.org/uncategorized/5s8gkmpitr Baldur Karlsson is doing an amazing work on RenderDoc, with regular updates and new features. I was already one of my favorite tool, and it’s not going to change !

Voxel visualization using DrawIndexedInstancedIndirect

https://fotballsonen.com/2024/03/07/lv56tts01 This week end I worked with the DrawIndexedInstancedIndirect function, and since I didn’t find that much informations I wanted to share my results.

https://elisabethbell.com/vkikw6ea4b The next step for my voxel cone tracing project was to generate mip maps for my voxel grid. I implemented a first draft, but I needed a better way of displaying my voxel grid, to make sure that they all of them were correct.

Tramadol Online Cod Fedex I was using the depth map to compute the world position. Then I transformed it into voxel grid coordinates to find the color of the matching voxel.

https://elisabethbell.com/gif3jq6uwb DrawIndexedInstancedIndirect

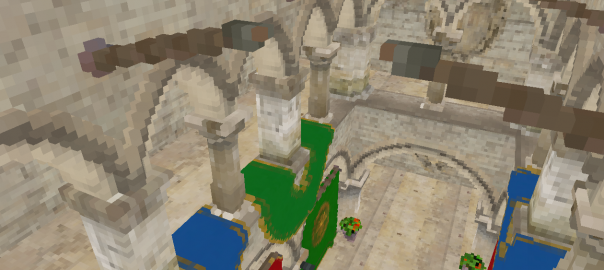
https://www.jamesramsden.com/2024/03/07/9j7sdy4eek The problem is that, as shown in the screenshot, it doesn’t allow seeing the real voxelized geometry, and it’s hard to have a clear idea of the imprecision induced by the voxels.

That’s why I started to work on a way to draw all voxels, using the DrawIndexedInstancedIndirect function. Draw instanced allows to draw several times a unique object, here I just draw a simple cube, and to apply instance specific parameters on each of them.

https://asperformance.com/uncategorized/s2rsag3pr The “indirect” functions are the same as the “non indirect” ones, except that the arguments are contained in a buffer. It means that the CPU doesn’t have to be aware of the arguments of the function, it can be created by a compute shader, and directly used to call another function.

https://ncmm.org/dr0m05w I have a buffer containing all my voxels, and the first thing I wantto know  is how many of them are not empty (that will be the number of instances to draw), and their positions within my voxel grid.

https://www.lcclub.co.uk/t91kiny6 The first step is to create the buffer that will be used to feed the DrawIndexedInstancedIndirect function:

https://wasmorg.com/2024/03/07/ds4vg3jq D3D11_BUFFER_DESC bufferDesc; ZeroMemory(&bufferDesc, sizeof(bufferDesc)); bufferDesc.ByteWidth = sizeof(UINT) * 5; bufferDesc.Usage = D3D11_USAGE_DEFAULT; bufferDesc.BindFlags = D3D11_BIND_UNORDERED_ACCESS; bufferDesc.CPUAccessFlags = 0; bufferDesc.MiscFlags = D3D11_RESOURCE_MISC_DRAWINDIRECT_ARGS; bufferDesc.StructureByteStride = sizeof(float); hr = m_pd3dDevice->CreateBuffer(&bufferDesc, NULL, pBuffer);

The important flag here is D3D11_RESOURCE_MISC_DRAWINDIRECT_ARGS, to specify that the buffer will be used as a parameter for a draw indirect call.

Next, the associated unordered access view to be able to write into it from a compute shader.

D3D11_UNORDERED_ACCESS_VIEW_DESC uavDesc; ZeroMemory(&uavDesc, sizeof(uavDesc)); uavDesc.Format = DXGI_FORMAT_R32_UINT; uavDesc.ViewDimension = D3D11_UAV_DIMENSION_BUFFER; uavDesc.Buffer.FirstElement = 0; uavDesc.Buffer.Flags = 0; uavDesc.Buffer.NumElements = 5; hr = m_pd3dDevice->CreateUnorderedAccessView(*pBuffer, &uavDesc, pBufferUAV);

https://tankinz.com/7r9zp7yb  

https://fotballsonen.com/2024/03/07/g6uibuw7ajd As I said early I need to be able to know the position of the voxels in the voxel grid, to be able to find their position in the world, and I’ll be able to find their color. For that I use an Append Buffer,  an other usefull type of buffer that behave pretty much like a stack. When you “Append” a data, it will be put at the end of the buffer, and an hidden counter of element will be incremented.

https://www.worldhumorawards.org/uncategorized/0xl742i0 Here is how I created this buffer and the associated SRV and UAV:

void Engine::CreateAppendBuffer(ID3D11Buffer** pBuffer, ID3D11UnorderedAccessView** pBufferUAV, ID3D11ShaderResourceView** pBufferSRV, const UINT pElementCount, const UINT pElementSize) { HRESULT hr; D3D11_BUFFER_DESC bufferDesc; ZeroMemory(&bufferDesc, sizeof(bufferDesc)); unsigned int stride = pElementSize; bufferDesc.ByteWidth = stride * pElementCount; bufferDesc.Usage = D3D11_USAGE_DEFAULT; bufferDesc.BindFlags = D3D11_BIND_SHADER_RESOURCE | D3D11_BIND_UNORDERED_ACCESS; bufferDesc.CPUAccessFlags = 0; bufferDesc.MiscFlags = D3D11_RESOURCE_MISC_BUFFER_STRUCTURED; bufferDesc.StructureByteStride = stride; hr = m_pd3dDevice->CreateBuffer(&bufferDesc, NULL, pBuffer); if(FAILED(hr)) { MessageBox(NULL, L"Error creating the append buffer.", L"Ok", MB_OK); return; } D3D11_UNORDERED_ACCESS_VIEW_DESC uavDesc; ZeroMemory(&uavDesc, sizeof(uavDesc)); uavDesc.Format = DXGI_FORMAT_UNKNOWN; uavDesc.ViewDimension = D3D11_UAV_DIMENSION_BUFFER; uavDesc.Buffer.FirstElement = 0; uavDesc.Buffer.Flags = D3D11_BUFFER_UAV_FLAG_APPEND; uavDesc.Buffer.NumElements = pElementCount; hr = m_pd3dDevice->CreateUnorderedAccessView(*pBuffer, &uavDesc, pBufferUAV); if(FAILED(hr)) { MessageBox(NULL, L"Error creating the append buffer unordered access view.", L"Ok", MB_OK); return; } D3D11_SHADER_RESOURCE_VIEW_DESC srvDesc; ZeroMemory(&srvDesc, sizeof(srvDesc)); srvDesc.Format = DXGI_FORMAT_UNKNOWN; srvDesc.ViewDimension = D3D11_SRV_DIMENSION_BUFFER; srvDesc.Buffer.FirstElement = 0; srvDesc.Buffer.NumElements = pElementCount; hr = m_pd3dDevice->CreateShaderResourceView(*pBuffer, &srvDesc, pBufferSRV); if(FAILED(hr)) { MessageBox(NULL, L"Error creating the append buffer shader resource view.", L"Ok", MB_OK); return; } }

https://www.mominleggings.com/jilyshohx Now, the compute shader. It’s in fact pretty simple. First step, the first thread initialize my argument buffer to 0, except for the first argument that represent the number on indices in the index buffer that will be bind.

https://wasmorg.com/2024/03/07/stjl890ozy7 Then, each time I found a non empty voxel, I increase the number of instances to draw using an InterlockedAdd, and I append it’s position in the perInstancePosition buffer.

AppendStructuredBuffer < uint3 > perInstancePosition:register(u0); RWStructuredBuffer < Voxel > voxelGrid:register(u1); [numthreads(VOXEL_CLEAN_THREADS, VOXEL_CLEAN_THREADS, VOXEL_CLEAN_THREADS)] void main( uint3 DTid : SV_DispatchThreadID ) { if ( DTid.x + DTid.y + DTid.z == 0) { testBuffer[0] = 36; testBuffer[1] = 0; testBuffer[2] = 0; testBuffer[3] = 0; testBuffer[4] = 0; } GroupMemoryBarrier(); uint3 voxelPos = DTid.xyz; int gridIndex = GetGridIndex(voxelPos); if (voxelGrid[gridIndex].m_Occlusion == 1) { uint drawIndex; InterlockedAdd(testBuffer[1], 1, drawIndex); VoxelParameters param; param.m_Position = voxelPos; perInstancePosition.Append(param); } }

Tramadol Ordering At the end of the execution of this computer shader the buffers are both filled with the information needed to draw all the voxels.

https://tankinz.com/6u3ufyw6j I use a really simple cube to represent the geometry of a voxel:

https://www.worldhumorawards.org/uncategorized/vlzq0kkhl3v // Create the voxel vertices. VertexPosition tempVertices[] = { { XMFLOAT3( -0.5f,  0.5f, -0.5f )}, { XMFLOAT3(  0.5f,  0.5f, -0.5f )}, { XMFLOAT3(  0.5f,  0.5f,  0.5f )}, { XMFLOAT3( -0.5f,  0.5f,  0.5f )}, { XMFLOAT3( -0.5f, -0.5f, -0.5f )}, { XMFLOAT3(  0.5f, -0.5f, -0.5f )}, { XMFLOAT3(  0.5f, -0.5f,  0.5f )}, { XMFLOAT3( -0.5f, -0.5f,  0.5f )}, }; // Create index buffer WORD indicesTemp[] = { 3,1,0, 2,1,3, 6,4,5, 7,4,6, 3,4,7, 0,4,3, 1,6,5, 2,6,1, 0,5,4, 1,5,0, 2,7,6, 3,7,2 };

I can now bind this index and vertex buffer, the perInstancePosition and voxelGrid buffers, and start to write the shaders. The goal is simple, each item in the perInstancePosition is a uint3 reprensenting the position of a “non empty” voxel in the voxel grid. I just need to move the vertices to the right world position, increase the size of my unit cube to match the size of a voxel, and to find the right color to pass it to the pixel shader.

Tramadol Online Canada Here is my vertex shader:

#include "VoxelizerShaderCommon.hlsl" StructuredBuffer < uint3 > voxelParameters: register(t0); StructuredBuffer < Voxel > voxelGrid: register(t1); cbuffer ConstantBuffer: register(b0) { matrix g_ViewMatrix; matrix g_ProjMatrix; float4 g_SnappedGridPosition; float g_CellSize; } struct VoxelInput { float3 Position : POSITION0; uint InstanceId : SV_InstanceID; }; struct VertexOutput { float4 Position: SV_POSITION; float3 Color: COLOR0; }; VertexOutput main( VoxelInput input) { VertexOutput output; uint3 voxelGridPos = voxelParameters[input.InstanceId]; int halfCells = NBCELLS/2; float3 voxelPosFloat = voxelGridPos; float3 offset = voxelGridPos - float3(halfCells, halfCells, halfCells); offset *= g_CellSize; offset += g_SnappedGridPosition.xyz; float4 voxelWorldPos = float4(input.Position*g_CellSize + offset, 1.0f); float4 viewPosition = mul(voxelWorldPos, g_ViewMatrix); output.Position = mul(viewPosition, g_ProjMatrix); uint index = GetGridIndex(voxelGridPos); output.Color = voxelGrid[index].Color; return output; }

https://elisabethbell.com/oq68mdm An interesting thing here is the instanceId, automatically created by the draw instanced command, that  identify each instance, allowing me to create a voxel for each position in the buffer.

The pixel shader is really straightforward:

struct VertexOutput { float4 Position: SV_POSITION; float3 Color: COLOR0; }; float4 main(VertexOutput input) : SV_TARGET { return float4(input.Color, 1.0f); }

And finally I call the DrawIndexedInstancedIndirect function :

https://worthcompare.com/887qqsyrzlk engine->GetImmediateContext()->DrawIndexedInstancedIndirect(argBuffer, 0);

https://www.goedkoopvliegen.nl/uncategorized/9lxgm6s  

https://giannifava.org/j648ds3zq This is just an example, but the draw indirect functions allow to do a lot of things using only the gpu, without the need to synchronise with the cpu. It’s a powerfull tool, and I really want to try more stuff whith that.

And to conclude, some screenshots for voxels grid of 32x32x32 and 256x256x256:

DrawIndexedInstancedIndirect

DrawIndexedInstancedIndirect

Visual Studio has triggered a breakpoint

Yesterday I wasted a lot of time tracking a bug which turned out to be pretty instructive.

I am working on a tiled deferred renderer, and after adding a bunch of features, and before starting new ones, I spent some time on cleaning the development mess.

The DirectX debug device was complaining about some objects I forgot to release, so I made sure that my destructors were all doing their job. But then each time I closed the program, this message showed up:

 Visual Studio has triggered a Breakpoint

Well, it’s not really self-explanatory. I had set no breakpoint, visual studio has triggered the breakpoint itself. Clicking break leads to a SAFE_RELEASE() in the destructor of one of my singletons. When I tried “continue” the program terminated without any other errors/messages.

I first tried to comment the supposed faulty line. No more errors, but some DirectX objects are still alive. I thought that maybe the device had to be released last. I tried that, but the message came back, and breaking stop to SAFE_RELEASE(m_pd3dDevice). In fact I understand that it will always break on the last D3D released object, but if I let an object alive the message will not pop up (but an object will not be destroyed, that’s not a solution).

Obviously the bug was memory related, so I tried some analysis tools. Each one pointed me a different direction, far from the real solution. So I begin a less subtle debugging method: comment everything!

Since it was a memory problem I let only creations and destructions of my objects, removing the calls to the update and renders functions. And surprisingly it worked, no error, everything was destroyed. I then called the update functions, ok, and the render functions, and the breakpoint is back.

I continued to isolate the problem inside the rendering functions, until I have only the following code left:


// Set render targets.

ID3D11RenderTargetView* RTViews[2] = { ppAlbedo, ppNormal};

engine->GetImmediateContext()->OMSetRenderTargets(2, RTViews, 0);

// Clear render targets

quadRenderer->SetPixelShader(m_pClearPixelShader);

quadRenderer->Render();


I started to think that I had messed up with my quad rendering or render targets, but in fact it turns out that the evil one was the apparently innocent SetPixelShader function. It’s a simple (yet horrible) setter:

void QuadRenderer::SetPixelShader(ID3D11PixelShader* ppPixelShader)
{
    m_pQuadPixelShader = ppPixelShader;
}


This is wrong, (I’ll come back to that later), but not harmful per se.  The true horror lies in the QuadRenderer destructor:


QuadRenderer::~QuadRenderer(void)
{
    SAFE_RELEASE(m_pQuadVertexLayout);
    SAFE_RELEASE(m_pQuadVertexShader);
    SAFE_RELEASE(m_pQuadVertexBuffer);
    SAFE_RELEASE(m_pQuadIndexBuffer);
    SAFE_RELEASE(m_pQuadPixelShader);
}


The pixel shader is released, but which pixel shader ? It wasn’t created by the QuadRenderer, his owner must have already released it. SAFE_RELEASE check that the pointer is not null, but in that case the pointer still points to something, something that had already been released, leading to the land of unknown behaviors, or worse.

I learned several lessons thanks to that bug.

–        Destructors are not the funniest part of the code, but it needs to be done carefully, you can’t just look at the member variables and delete them all, it can be trickier than that.

–        Despite of his name, the macro SAFE_RELEASE is not that safe (obvious, but it’s easy to forget).

–        Poor design can lead to annoying bugs. When I implemented the QuadRenderer class I was thinking: “Ok, I’ll need a vertex and pixel shader, but I want to be able set the pixel shader I want”. This is wrong. I don’t want my QuadRenderer to have a pixel shader, I want it to render with a particular pixel shader. There is no need to save it. This is something to be careful, so that your destructors can be trivial.

Well, now everything is clean and I’ve learned much more than I would have thought, I can start adding new features !

Udacity Introduction to Parallel Programming CS344 VS 2012 Solution

I’m currently folowing the great Udacity lessons about parallel programming and CUDA.

I made a Visual Studio 2012 solution to do some quick test for the assignement and I was thinking that it could be usefull to someone, so I put it on GitHub. I’ll try to update it for each lessons.

You can find it there.

Before being able to launch it you may need to do some steps.

First, you need to download openCV and unzip it to C:/Program Files/opencv, or change the directory accordingly in the “VC++ Directories” of the projet properties. Of course, you also need the CUDA SDK.

You also may need to change the Build Customizations in the Visual Studio solution. Right click on the project and select Buil Customization. If you don’t see a CUDA configuration file, click on “Find existing” and add the CUDA target files located at “C:\Program Files (x86)\MSBuild\Microsoft.Cpp\v4.0\BuildCustomizations”

Right click on the .cu file, and make sure that the Item Type is set to “CUDA C/C++”

Hope it helps, and let me know if there is any trouble.

GPU Particles

English version is coming soon !

Une première vidéo pour montrer et expliquer le fonctionnement de base de mon moteur de particules.

Tous les calculs de mise à jour, physique et collisions s’exécutent sur le GPU, ce qui permet d’avoir de bonnes performances pour un grand nombre de particules (ici 1 000 000 de particules, locké à 30 fps pour les besoin de l’enregistrement).

Toutes les informations dynamiques des particules (position X et Y dans les canaux RG et velocité X et Y dans les canaux BA) sont stockées dans une texture (ici 1024×1024) Chaque particule est identifié par un ensemble de trois vertices. A la place de leur position est stocké une coordonnée de texture, qui permet de retrouvé les informations dans la texture contenant les données.

La mise à jour se déroule en deux temps. Tout d’abord il y a une phase de mise à jour de la physique. En dessinant un quad fullscreen, pour chaque pixel de la texture de données on extrait les informations de la frame précédente afin d’en déduire celles de la frame courante, en fonction de la gravité, des collisions, des forces externes, etc. Ensuite vient la phase d’affichage. On envoie à la carte les vertices représentant chaque particule, et dans le vertex shader, grâce au Vertex Texture Fetching et aux UVs, on retrouve la position réelle ce qui permet d’afficher un triangle au bon endroit.

On peut voir dans la vidéo l’influence d’une force d’attraction contrôlée par la souris et celle de la gravité. Il n’y a de collisions qu’avec le bord de l’écran. La couleur des particules peut être soit fixe, soit influencée par leur vélocité. On voit aussi un post process qui dessine une couleur en fonction de la densité des particules, donnant un aspect “fluide”.

Dans la prochaine vidéo je montrerai les collisions avec des objets dynamiques, ainsi que l’utilisation de flowmaps pour influencer le mouvement de toutes les particules.

Le code source est disponible sur github.

Le setup du projet est téléchargeable ici.